Pages

Tuesday, November 19, 2013

{Spaghetti Squash Hash-cakes}

Like previously, I've been on a vegetable craze. Seriously, I've never eaten so many vegetables in my life, but I LOVE it and I feel great! 

Breakfast can be a challenge to find exciting ways to eat vegetables. I mean, green smoothies can get old after awhile.. But these spaghetti squash hash-cakes are the perfect vegetable breakfast!


I called these hash-cakes, because they have the texture of hash browns, but are like pancakes. So, voila, hash-cakes :)

 
Infused with the taste of rosemary, these hash-cakes easily please. Even though I bake an entire spaghetti squash, I only use one cup of spaghetti squash per serving. This recipe is great to use if you buy a large spaghetti squash and don't want to use all of it for another recipe, for example "spaghetti" and meatball. 


I serve mine with a little bit of ketchup drizzled over the top. If you're not following an AIP diet, these hash-cakes would go wonderfully with some scrambled eggs, or even a fried egg in the middle of the hash-cakes. However you decide to enjoy these, I hope these hash-cakes leave you satisfied and energized!

{SPAGHETTI SQUASH HASH-CAKES}


Ingredients:

1 spaghetti squash
2 teaspoons coconut flour
2 teaspoons fresh rosemary, chopped
1 teaspoon dried basil
pepper to taste 
coconut oil 

Instructions:

Bake a spaghetti squash at 375 for 40 minutes. When it is done baking, using a fork,

To make one serving of hash-cakes, combine a cup of spaghetti squash with coconut flour and herbs. In a skillet greased with coconut oil, take about 1/4 cup of the spaghetti squash, put it in the pan and smash together until it sticks. Repeat until all the spaghetti squash is cooking in the pan. Cook for about 7 minutes, or until lightly crisped, then flip the hash-cakes and finish cooking for about 5 minutes. Remove from the pan and enjoy!

**If you want to make more than one serving, just increase the amount still using the  1 cup of spaghetti squash to coconut flour/herbs ratio.

**If your spaghetti squash is extra runny and doesn't stick together very well, add more coconut flour. Coconut flour is a drier flour, and easily soaks up extra moisture :)

Sunday, November 17, 2013

{Perfectly Pumpkin Bagels}

I am so excited to finally have a bagel recipe!!!!! Really, jumping-up-and-down excited!!!!

Bagels optimize my inner struggle with my complicated food lifestyle. For 99% of the time, I truly enjoy my diet and love making new creations loaded with vegetables and good healthy nutirents. But sometimes I just want a warm, chewy, scrumptious bagel, lathered in rich cream cheese. I can dream, can't I?

I even wrote a college essay on my "bagels" in life and in running- the time where it is tempting to give up and go for the easier and more temporarily satisfying decision instead of doing what is right for me and my training. Learning to say no to bagels. Sounds like a good book title.

Until now, every time I tried to create a bagel-type of bread, they came out mushy, doughy bites that tasted like flaxseed meal. Not the bagel I had dreamed of.

But now I can say- no,  shout YES to bagels. The secret? A little bit of tapioca starch for the  classic bagel chewiness, chia seed meal for the "egg" (I've found make chia meal "eggs" actually work better than the classic flaxseed meal egg in my baking experiments), and coconut milk for extra moisture. 


I ate mine with a little bit of Trader Joe's delicious pumpkin butter. Although I didn't try it, I thought of making a little bit of coconut whipped cream, sprinkling some cinnamon and some pumpkin butter in it to make pumpkin "cream cheese" to put on top. 
 
 I hope that you enjoy these lovely creations as much as I do!  


  {PERFECTLY PUMPKIN BAGELS}

Ingredients:

1.5 Tablespoons chia meal (chia seeds ground in a coffee grinder)
3 Tablespoons pumpkin puree
2 Tablespoons water
1 Tablespoons apple cider vinegar
3/4 teaspoon xanthan gum
 1/4 cup plus 2 Tablespoons coconut milk

1/4 cup coconut oil, melted
1/2 cup tapioca starch
1/2 cup coconut flour
1/2 teaspoon cinnamon
1/4 teaspoon nutmeg (*omit for AIP)
1/4 teaspoon ginger
1/4 teaspoon cloves
1 teaspoon baking soda
1 teaspoon baking powder (* make sure it is corn-free. Or better yet, make your own)


Instructions:

1.  Add chia seed meal, pumpkin puree, water, apple cider vinegar,xanthan gum, and coconut milk in an electric blender. In order, add coconut oil, then flours and spices, then baking soda and baking powder, scraping down the sides of the bowl as necessary. Beat until a dough-like mass begins to form.

2. Forming the dough into large balls, depending on how large you want them. I made mini bagels forming balls of dough about the size of two tablespoons. To make larger bagels, I'd suggest forming dough the size of your fist. Poke a hole in the middle of the dough ball and shape to form a bagel using dry hands. Place the bagels on a baking sheet lined with parchment paper.

3. Bake at 350 for about 20 minutes, depending on size of bagels. I made mini bagels, and cooked them for 15 minutes. Allow them to cool for at least 10 minutes before slicing. Enjoy!


Variation Ideas:

 *I will be making a few of these shortly and posting them. That said, these are just my ideas, so they haven't been proven yet. But feel free to experiment- it's fun!!!

For all recipe variation ideas, omit pumpkin puree and either replace with unsweetened applesauce or 3 Tablespoons more of coconut milk

Cinnamon Raisin- add 1/4 cup of raisins and 1/2 teaspoon more of cinnamon
Cranberry Orange- add 1/4 cup of dried cranberries (or Trader Joe's orange cranberries) with 1/2   teaspoon of orange zest
Chocolate-zucchini- Add 1/4 cup of shredded zucchini and 2 Tablespoons of cocoa powder
Chocolate chip-  add 1/4 cup of EnjoyLife mini   chocolate chips
Apple-cinnamon- increase cinnamon, add 1/4 chopped apples. 


Saturday, November 16, 2013

{Lemon Herb Chicken Salad with Honey Mustard Dressing}

 As I finish out the cross country season, I've been focusing even more on getting an ample amount of vegetables in my diet. Maybe even more than ample amount. Lately, I have lived and breathed vegetables. 

This new energy for a vegetable-infused diet has sparked some more creativity, some that I hope to share with you all in the coming weeks! I've experimented some vegetable casseroles, green smoothies, and now that the weather has finally turned a tad bit cooler, I've tried my hand at soup-making. 

But so far, this salad is my new favorite of all my creations. The honey dressing is sweet with just enough spicy kick from the red pepper flakes.* I apologize for my lack of photos- I made the salad right after my cross country meet, so I was ravenous and not very picky about the amount of photos. Blame my appetite :)

I hope you enjoy this refreshingly delicious salad as much as I do. May you find a new passion for vegetables :)


{LEMON HERB CHICKEN SALAD WITH HONEY MUSTARD DRESSING}

 Serves 2


For the vegetables:


Wash and chop one head of romaine or red leaf lettuce. Add a handful of washed spinach and kale to the bowl, then set aside.

For the chicken:

1 four ounce chicken breast
1/2 teaspoon dried rosemary
1/2 teaspoon basil
ground pepper


Slice one four ounce breast of chicken into bite sized pieces. Heat coconut oil in a pan and cook the chicken. Season with rosemary, basil, and ground pepper after about five minutes and stir. Finally, add a squeeze of lemon juice over the sizzling chicken.

For the dressing:

3 Tablespoons olive oil
2 Tablespoons white wine vinegar* 
2 Tablespoons spicy brown mustard, or Dijon mustard
2 teaspoons honey 
1 garlic clove, minced
1/4 teaspoon red pepper flakes

Whisk ingredients together, then set aside. 


Assembling  the salad:

Combine the green leaf lettuce, kale and spinach until thoroughly mixed. Sprinkle chicken pieces on top, and finally drizzle a bit of the salad dressing on top (don't worry that there is enough dressing leftover for later salads). Finally, toss the salad. Enjoy!


*For those strictly following the AIP diet, omit the red pepper flakes. 

**As with anything used in the Paleo and AIP kitchen, always make sure you check the ingredients. Some white wine vinegars are derived from corn sources. The one I used comes from grapes, so it is safe. 


Sunday, October 27, 2013

{Chicken Nuggets}

Chicken nuggets are a childhood staple. I remember having my DinoBuddies lathered in ketchup, enjoying them with our neighborhood friends during our picnic lunches before we'd resume playing outside for hours.  There is something nostalgic and fun about chicken nuggets. I don't know how to explain it, but I think everyone can agree chicken nuggets are special. 

Ever since I've been on this health journey, I've had to let go of many old favorites. But I've continually craved chicken nuggets. So finally today I set out to make them. 


And my, were they a success! These are so much better than processed chicken nuggets- why did I never have these as a child?!? Crispy, brown, and perfect, these definetly satisfied my craving!


I guarentee every child- and adult- will fall in love with these chicken nuggets. If you're looking for trip down memory lane with your taste buds, I encourage you to make these. You won't regret it :)
 

{Chicken Nuggets}


2 4ounce chicken breasts
3 teaspoons coconut flour
1/4 teaspoon ground mustard
1/4 teaspoon paprika
1/4 teaspoon dried basil
 coconut oil

Instructions:

Pound the chicken to desired thickness. Then cut into bite-sized chunks. Heat some coconut oil in a skillet for frying. 

Meanwhile, mix the coconut flour and spices together in a small bowl. When it is thoroughly mixed, spread the mixture thinly and evenly on a paper plate.

Take the pieces of chicken and dip both sides in the coconut flour mixture. Place the chicken pieces in the skillet and cook until browned on one side. Then flip the chicken and cook thoroughly. Repeat, adding oil as necessary, until all the chicken is cooked. 

Serve with ketchup, mustard, or however you desire. Enjoy :)

Saturday, October 26, 2013

Mt. SAC Invitational 2013

Last night I returned from my last meet at the Mt. SAC Invitational with my high school team. I'll be honest, I was a little sad before my race, knowing this would be my last. The beginning of the season of lasts is beginning, and is leaving a little nostalgic. I'm excited and ready to grow up, but the change is a hard process. But just because its hard doesn't mean it's not good. 

 I have to say that this was BY FAR my favorite time at Mt. SAC. Our varsity boys got 9th place out of 35 teams, and five out the the seven of the them broke 19:00. There are no words to describe my pride and happiness! I was jumping down and high-fiving all around, but that wasn't enough to express my joy! :)

Our girls did amazing too! For many of the girls, this was their first time running the course. For those of you who don't know, Mt. SAC is a nationally acclaimed course, known for its difficulty. One of the hills is named "Poop Out." Not to encouraging of a thing to approach when you're halfway done with the race... :)

But, that said, our girls sure proved their determination and perseverance, with PR's across the board. Julia, a freshman who seriously has so much potential, finished in 4th place in her race, even with being sick and having a hurt knee. Again,  I am so proud! I can't wait to come back and visit the team next year and see much more of a beast she is!

This year's Mt. SAC was so much of a blessing, and then on top of it, I PR'd by 30 seconds from last year. I was so pleased, surprised, and relieved. I finished in 3rd place. I'm not quite sure what my time is. My coach clocked it at 19:58, I clocked it at 20:01 (after hitting my watch in after-race delirium), but the official results say 20:03. I'm going to say I unofficially broke 20:00, but I'm just so happy I improved so much!


I really focused on my "dead zone," the point of the race where I loose focus for a bit and get too much inside of my head. At Mt. SAC, this usually happens just after the 2 mile, when the course goes behind the last hill, where it levels out and the course veers from the crowds. I know that I lose time in my "dead zones" so I really focused on continuing my pace and picking off people from the previous race. Then I charged up Reservoir hill, encouraged by my teammates to kick to the finish. I gave everything, crossing the finish line filled with satisfaction knowing that this last race was the perfect closure to four years of memories and growth as a runner.


The day before the race while we ran the course for practice, I was remembering my first time there as a freshman, looking at Switchbacks (the first hills) with such awe and terror, thinking I would never survive. Then to my sophomore year, where Mt. SAC was my first race back from injury, fueled by frustration and a readiness to finally run. Then last year, where I surpiringly came in fourth place and finished ten seconds behind my rival. So many great memories. I'm so glad that this year was the last Mt. SAC, because it was by far the best in so many ways.

Across the board, my team did so well, and as I said previously, I cannot express my pride and joy.  I had so much fun, and left knowing that I gave my all in the race. I reached all my  goals, with the most important one to keep my focus on Christ.

And then we finished the day with our cross country team tradition- going to Disneyland for mickey's Halloween Party. What is better than shorter lines, free candy, and hanging out with the team?! I had so much fun, laughing until my stomach ached, smiling until my cheeks hurt, and just plain being ridiculous and enjoying it.

Mt. SAC forever will have a special place in my heart, not because of the times I've placed, the PR's made, or victories achieved, but simply because it represents the fond memories of every cross country team I've been blessed to be a part of. Mt. SAC will forever be a nostalgic memory, a constant reminder of accomplishments, frustrations, and pure joy. I will forever be thankful for the time that I have had with all my teams, and I am so excited to finish out this season strong.

//Philippians 3:14//


Sunday, October 20, 2013

Fresh Herb Pesto Pizza with Lemon Chicken


I honestly miss my days of pizza. Not because I want to be like every other teenager in America, but I sincerely miss our days of make your own pizza. It was such a memorable family occasion, watching my dad make the dough from scratch, designing random shapes with the pizza dough, slathering on way too much cheese and making cheese pockets in the crust, then peeking into the oven every few minutes to watch our creations bake.
  I have now resurrected those days of make your own pizza. It is a little different now because there is no cheese, no yeasted crust, and no chewy crust. But I can honestly say I'll choose this pizza any day over the traditional American pizza, because not only is it way healthier, but I know that my body will benefit from my enjoyment of it. How many people can say that about their pizza?


This yummy, yummy pizza was super easy to make and even more delicious! The lemony twist combined with the freshness of the herbs was a wonderful combination. I thoroughly enjoyed my night of "make your own pizza." I hope you enjoy yours :)


{FRESH HERB PESTO PIZZA WITH LEMON CHICKEN}


INGREDIENTS:

For the crust-

1 cauliflower, chopped into florets
1 clove of garlic, minced


For the chicken-
1 boneless chicken breast, chopped into chunks
3/4 teaspoon dried oregano
3/4 teaspoon dried basil
1 teaspoon lemon juice
hint of lemon zest
salt and pepper to taste


For the pesto- 
2 cups fresh basil
3 Tablespoons olive oil
1/3 cup shredded coconut
1 Tablespoon lemon juice
zest of 1 lemon


INSTRUCTIONS: 

1. Preheat the oven to 350 F
2. Place the chopped cauliflower and garlic into a food processor and grind into a rice-like texture. On a baking sheet lined with parchment paper, form the cauliflower into a "dough" about a 1/2 inch thick, careful to press it together so that it sticks together and holds. Place in the oven for 20 to 25 minutes, or until lightly browned and still fairly moist.
 3. Meanwhile, begin cooking the chicken either on a nonstick skillet or skillet lighhtly greased with coconut oil. Once it starts to brown, add the spices and lemon juice. Remove from heat when it is fully cooked.
 4. As the chicken is cooking, begin making the pesto. Place basil, coconut, olive oil, lemon juice, and lemon zest into  food processor and pulse until it reaches a semi-fine consistency. 
5. Once the cauliflower crust is done, remove from heat and cool for about...
6. Layer the crust with pesto and then sprinkle on the chicken. If you want, feel free to add vegetables, other meats, or whatever you want. It's make your own pizza night!
Enjoy!


Saturday, October 19, 2013

{Autumn Apple Pie}


I have found a new name for myself. I made up a label as "Paleo plus," since I'm Paleo plus nut-free, seed-free, egg-free, mostly potato-free. As I was browsing the web for some cooking inspiration, I came across my new name- AIP. I am following a mostly Autoimmune Protocol diet ( I do occasionally have things with tomatoes). Its so nice to have a name. 

That said, its been especially difficult to come up with some fall treats. Last weekend I tried making pumpkin bread. I failed miserably- the pumpkin bread was dry, and tasted nothing like that soothing pumpkin taste I craved. I temporarily gave up on the pumpkin bread (Don't worry, I will resume the pumpkin quest soon), and instead tried to create an absolute favorite- apple pie. 


Last night was the first night in EVER that we had a family movie night. And of course, every movie needs to be accompanied with a treat! :)

 During my desperate search for some creativity, I came across a few very helpful and creative AIP blogs. For those of you who are following AIP, or simply trying to minimize a few more things in your diet, I highly recommend that you go explore too! It can be a little overwhelming, but at the end of my hour long quest, I felt so accomplished. And, most importantly, inspired.


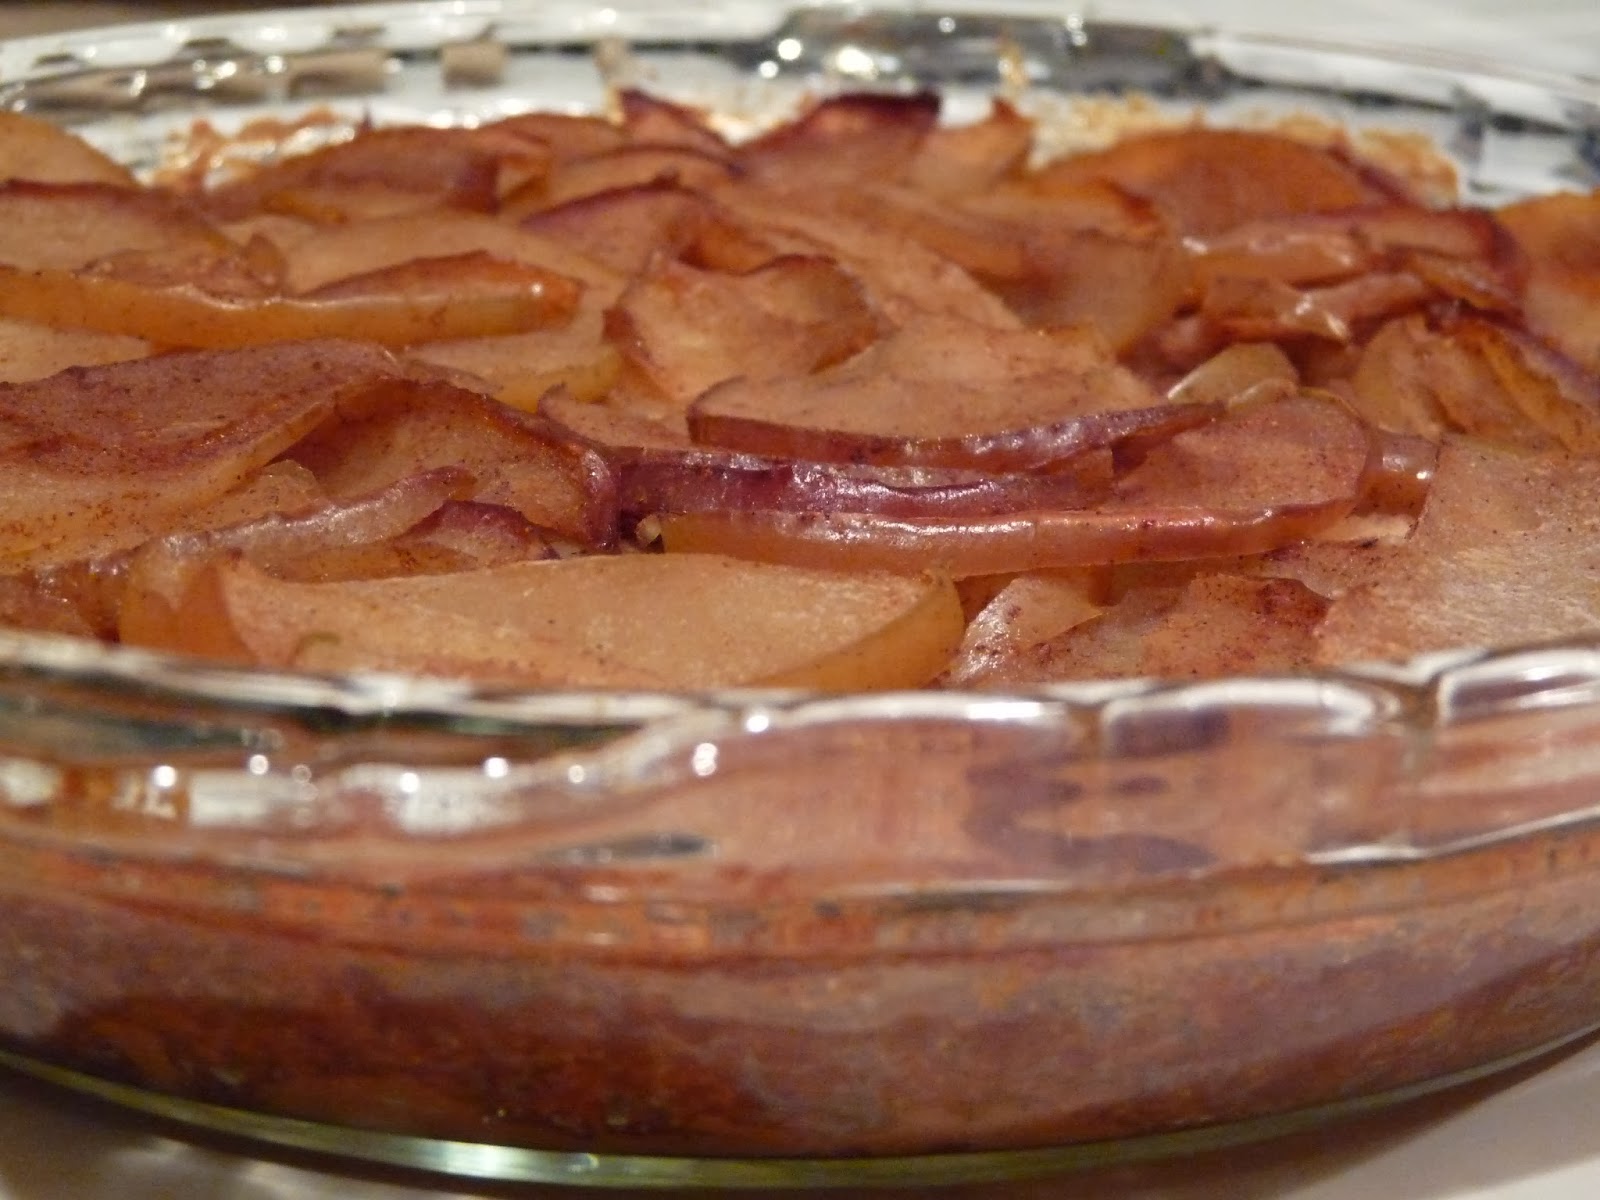
Back to the apple pie. Besides being super duper easy to make, it was so delicious! However I will warn you, if you're like my mom and don't like coconut, do not try this. Apparently I neglected to forewarn my mom, who asked, when tasting it "does this have coconut?" Practically the whole thing is coconut! Well, besides the apples, obviously.


If you are looking for a yummy, melt-in-your mouth, easy, allergy-friendly autumn recipe, this apple pie was made for you! The pie is gone. I made it last night, and it is gone. I may or may not have had a quarter of it... Its healthy, right? 

My suggestion for making this pie even better is to add a dollop of coconut whipped cream on top. Paleo Cupboard has a great recipe here 
 
I hope you enjoy this yummy autumn treat as much as my family did! 


{AUTUMN APPLE PIE}


INGREDIENTS:

3/4 cup coconut flour
1/3 cup plus 1 Tablespoon coconut oil
1/3 cup finely shredded coconut
pinch of salt

6 apples, sliced thinly
1/3 cup maple syrup
2 Tablespoons coconut sugar
1 1/2 teaspoons cinnamon
1/2 teaspoon ground ginger
1 teaspoon tapioca starch

Instructions:

Preheat the oven to 350 F. 

For the crust, combine the coconut flour, coconut oil, shredded coconut, and salt in a food processor, mixing until it resembles a thick paste. Spread into an 8 inch pie pan, lightly greased with coconut oil. Place in the oven for about 15 minutes, or until the crust begins to brown. 

Meanwhile, combine the apples, cinnamon, ginger, and tapioca starch in a large bowl, mixing until well-incorporated. Then, add the syrup and coconut sugar, stirring until  thorughouly mixed. 

Pour the filling mixture into the pre-baked pie crust. Place parchment paper over the pie and press a cake pan on top of the pie- this ensures that the pie bakes evenly. Bake for about an hour and 20 minutes, then remove the parchment paper and cake pan and bake for another 5 minutes. 

Remove from the oven and let it cool. If you can wait long enough and don't mind, I found that letting the pie sit and then refrigerating it really helped the pie to not crumble. Unlike a traditional pie, this tends to be a bit more tricky and crumbly. Don't cry if your piece of pie winds up looking like a cobbler- I promise, it's still yummy and it's still pie!

Serve with coconut whipped cream, coconut ice cream, sprinkle with shredded coconut, or better yet, just eat it!