Pages

Saturday, October 26, 2013

Mt. SAC Invitational 2013

Last night I returned from my last meet at the Mt. SAC Invitational with my high school team. I'll be honest, I was a little sad before my race, knowing this would be my last. The beginning of the season of lasts is beginning, and is leaving a little nostalgic. I'm excited and ready to grow up, but the change is a hard process. But just because its hard doesn't mean it's not good. 

 I have to say that this was BY FAR my favorite time at Mt. SAC. Our varsity boys got 9th place out of 35 teams, and five out the the seven of the them broke 19:00. There are no words to describe my pride and happiness! I was jumping down and high-fiving all around, but that wasn't enough to express my joy! :)

Our girls did amazing too! For many of the girls, this was their first time running the course. For those of you who don't know, Mt. SAC is a nationally acclaimed course, known for its difficulty. One of the hills is named "Poop Out." Not to encouraging of a thing to approach when you're halfway done with the race... :)

But, that said, our girls sure proved their determination and perseverance, with PR's across the board. Julia, a freshman who seriously has so much potential, finished in 4th place in her race, even with being sick and having a hurt knee. Again,  I am so proud! I can't wait to come back and visit the team next year and see much more of a beast she is!

This year's Mt. SAC was so much of a blessing, and then on top of it, I PR'd by 30 seconds from last year. I was so pleased, surprised, and relieved. I finished in 3rd place. I'm not quite sure what my time is. My coach clocked it at 19:58, I clocked it at 20:01 (after hitting my watch in after-race delirium), but the official results say 20:03. I'm going to say I unofficially broke 20:00, but I'm just so happy I improved so much!


I really focused on my "dead zone," the point of the race where I loose focus for a bit and get too much inside of my head. At Mt. SAC, this usually happens just after the 2 mile, when the course goes behind the last hill, where it levels out and the course veers from the crowds. I know that I lose time in my "dead zones" so I really focused on continuing my pace and picking off people from the previous race. Then I charged up Reservoir hill, encouraged by my teammates to kick to the finish. I gave everything, crossing the finish line filled with satisfaction knowing that this last race was the perfect closure to four years of memories and growth as a runner.


The day before the race while we ran the course for practice, I was remembering my first time there as a freshman, looking at Switchbacks (the first hills) with such awe and terror, thinking I would never survive. Then to my sophomore year, where Mt. SAC was my first race back from injury, fueled by frustration and a readiness to finally run. Then last year, where I surpiringly came in fourth place and finished ten seconds behind my rival. So many great memories. I'm so glad that this year was the last Mt. SAC, because it was by far the best in so many ways.

Across the board, my team did so well, and as I said previously, I cannot express my pride and joy.  I had so much fun, and left knowing that I gave my all in the race. I reached all my  goals, with the most important one to keep my focus on Christ.

And then we finished the day with our cross country team tradition- going to Disneyland for mickey's Halloween Party. What is better than shorter lines, free candy, and hanging out with the team?! I had so much fun, laughing until my stomach ached, smiling until my cheeks hurt, and just plain being ridiculous and enjoying it.

Mt. SAC forever will have a special place in my heart, not because of the times I've placed, the PR's made, or victories achieved, but simply because it represents the fond memories of every cross country team I've been blessed to be a part of. Mt. SAC will forever be a nostalgic memory, a constant reminder of accomplishments, frustrations, and pure joy. I will forever be thankful for the time that I have had with all my teams, and I am so excited to finish out this season strong.

//Philippians 3:14//


Sunday, October 20, 2013

Fresh Herb Pesto Pizza with Lemon Chicken


I honestly miss my days of pizza. Not because I want to be like every other teenager in America, but I sincerely miss our days of make your own pizza. It was such a memorable family occasion, watching my dad make the dough from scratch, designing random shapes with the pizza dough, slathering on way too much cheese and making cheese pockets in the crust, then peeking into the oven every few minutes to watch our creations bake.
  I have now resurrected those days of make your own pizza. It is a little different now because there is no cheese, no yeasted crust, and no chewy crust. But I can honestly say I'll choose this pizza any day over the traditional American pizza, because not only is it way healthier, but I know that my body will benefit from my enjoyment of it. How many people can say that about their pizza?


This yummy, yummy pizza was super easy to make and even more delicious! The lemony twist combined with the freshness of the herbs was a wonderful combination. I thoroughly enjoyed my night of "make your own pizza." I hope you enjoy yours :)


{FRESH HERB PESTO PIZZA WITH LEMON CHICKEN}


INGREDIENTS:

For the crust-

1 cauliflower, chopped into florets
1 clove of garlic, minced


For the chicken-
1 boneless chicken breast, chopped into chunks
3/4 teaspoon dried oregano
3/4 teaspoon dried basil
1 teaspoon lemon juice
hint of lemon zest
salt and pepper to taste


For the pesto- 
2 cups fresh basil
3 Tablespoons olive oil
1/3 cup shredded coconut
1 Tablespoon lemon juice
zest of 1 lemon


INSTRUCTIONS: 

1. Preheat the oven to 350 F
2. Place the chopped cauliflower and garlic into a food processor and grind into a rice-like texture. On a baking sheet lined with parchment paper, form the cauliflower into a "dough" about a 1/2 inch thick, careful to press it together so that it sticks together and holds. Place in the oven for 20 to 25 minutes, or until lightly browned and still fairly moist.
 3. Meanwhile, begin cooking the chicken either on a nonstick skillet or skillet lighhtly greased with coconut oil. Once it starts to brown, add the spices and lemon juice. Remove from heat when it is fully cooked.
 4. As the chicken is cooking, begin making the pesto. Place basil, coconut, olive oil, lemon juice, and lemon zest into  food processor and pulse until it reaches a semi-fine consistency. 
5. Once the cauliflower crust is done, remove from heat and cool for about...
6. Layer the crust with pesto and then sprinkle on the chicken. If you want, feel free to add vegetables, other meats, or whatever you want. It's make your own pizza night!
Enjoy!


Saturday, October 19, 2013

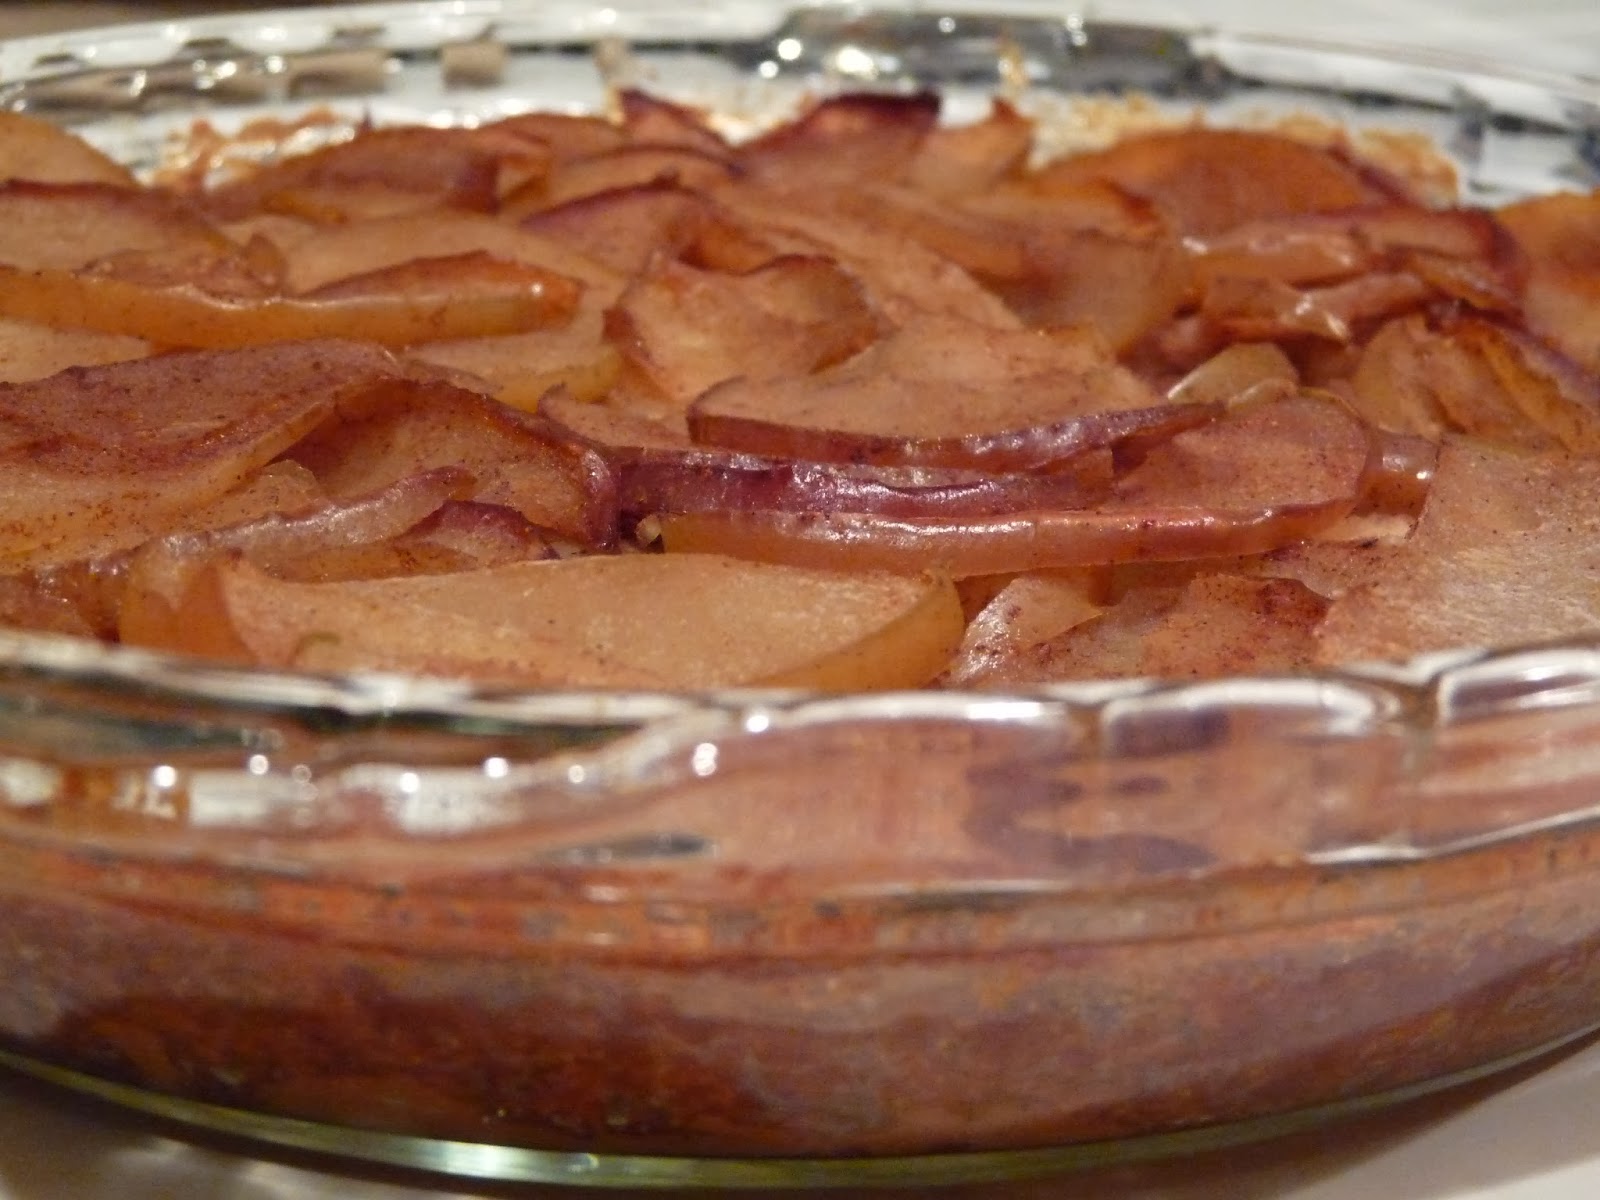
{Autumn Apple Pie}


I have found a new name for myself. I made up a label as "Paleo plus," since I'm Paleo plus nut-free, seed-free, egg-free, mostly potato-free. As I was browsing the web for some cooking inspiration, I came across my new name- AIP. I am following a mostly Autoimmune Protocol diet ( I do occasionally have things with tomatoes). Its so nice to have a name. 

That said, its been especially difficult to come up with some fall treats. Last weekend I tried making pumpkin bread. I failed miserably- the pumpkin bread was dry, and tasted nothing like that soothing pumpkin taste I craved. I temporarily gave up on the pumpkin bread (Don't worry, I will resume the pumpkin quest soon), and instead tried to create an absolute favorite- apple pie. 


Last night was the first night in EVER that we had a family movie night. And of course, every movie needs to be accompanied with a treat! :)

 During my desperate search for some creativity, I came across a few very helpful and creative AIP blogs. For those of you who are following AIP, or simply trying to minimize a few more things in your diet, I highly recommend that you go explore too! It can be a little overwhelming, but at the end of my hour long quest, I felt so accomplished. And, most importantly, inspired.


Back to the apple pie. Besides being super duper easy to make, it was so delicious! However I will warn you, if you're like my mom and don't like coconut, do not try this. Apparently I neglected to forewarn my mom, who asked, when tasting it "does this have coconut?" Practically the whole thing is coconut! Well, besides the apples, obviously.


If you are looking for a yummy, melt-in-your mouth, easy, allergy-friendly autumn recipe, this apple pie was made for you! The pie is gone. I made it last night, and it is gone. I may or may not have had a quarter of it... Its healthy, right? 

My suggestion for making this pie even better is to add a dollop of coconut whipped cream on top. Paleo Cupboard has a great recipe here 
 
I hope you enjoy this yummy autumn treat as much as my family did! 


{AUTUMN APPLE PIE}


INGREDIENTS:

3/4 cup coconut flour
1/3 cup plus 1 Tablespoon coconut oil
1/3 cup finely shredded coconut
pinch of salt

6 apples, sliced thinly
1/3 cup maple syrup
2 Tablespoons coconut sugar
1 1/2 teaspoons cinnamon
1/2 teaspoon ground ginger
1 teaspoon tapioca starch

Instructions:

Preheat the oven to 350 F. 

For the crust, combine the coconut flour, coconut oil, shredded coconut, and salt in a food processor, mixing until it resembles a thick paste. Spread into an 8 inch pie pan, lightly greased with coconut oil. Place in the oven for about 15 minutes, or until the crust begins to brown. 

Meanwhile, combine the apples, cinnamon, ginger, and tapioca starch in a large bowl, mixing until well-incorporated. Then, add the syrup and coconut sugar, stirring until  thorughouly mixed. 

Pour the filling mixture into the pre-baked pie crust. Place parchment paper over the pie and press a cake pan on top of the pie- this ensures that the pie bakes evenly. Bake for about an hour and 20 minutes, then remove the parchment paper and cake pan and bake for another 5 minutes. 

Remove from the oven and let it cool. If you can wait long enough and don't mind, I found that letting the pie sit and then refrigerating it really helped the pie to not crumble. Unlike a traditional pie, this tends to be a bit more tricky and crumbly. Don't cry if your piece of pie winds up looking like a cobbler- I promise, it's still yummy and it's still pie!

Serve with coconut whipped cream, coconut ice cream, sprinkle with shredded coconut, or better yet, just eat it! 


Monday, September 30, 2013

{Cranberry Orange Bread}

It is fall!!!! I'm excited to start experimenting with new recipes, cooking up some wonderful fall time classics. Especially now that I'm HALF-WAY done with college applications! Whoohoo!!!! Can you tell I'm excited? :)

Anyway, with that accomplished, I got a little relaxing time to bake. Not for me, because this recipe is not egg-free or nut-free (at least not yet. I will be attempting egg and nut free bread soon), but for my family. As I've said before, my family cannot get enough of the apple-cinnamon bread I make, so I though I'd experiment. Since we had a HUGE bag of dried cranberries, that my brother uses for making his own trail mix, I thought an orange-cranberry twist would be fun. 


Needless to say, it was a hit. Half a loaf was gone in probably ten minutes. The rest soon followed. My brother said it tasted like a bagel in that it was chewy and soft. I took that as a high compliment, coming from the world's pickiest eater ever!

Here's a picture of my brother in pure heaven. 


And another. I think I just became the best sister in the entire world right there. 


You'll notice this is basically the same recipe as the apple cinnamon bread, with a few slight variations. That said, feel free to use the framework and get creative with your own variations! I know I'll be trying a pumpkin bread and cinnamon swirl soon! :)


{CRANBERRY ORANGE BREAD}


Ingredients:

2 cups almond flour 
1/2 cup potato starch
1/2 cup tapioca starch
1/4 cup granulated sugar
1 Tablespoon xanthan gum
3/4 teaspoon salt


2 teaspoons sugar
2 1/4 teaspoons active dry yeast
1/2 cup hot water (110 F) 

1/2 cup warm almond milk (110 F)
3 eggs
3 Tablespoons olive oil

1/4 dried cranberries
1/2 teaspoon orange zest


Instructions:

Here's how I've found the most success: 

1. Preheat the oven to 325 F.  Place the almond flour in the food processor and grind about 15 seconds in order to break up clumps. Mix all the dry ingredients in a large food processor and pulse for a few seconds. Next add the orange zest and mix thoroughly.

2. Mix the yeast, sugar, and hot water in a small bowl. Mix it up gently, place a towel over the bowl, then place it in a warm and disclosed place and set a timer for 10 minutes. 

3. While waiting for the yeast, heat up the milk, bring eggs to room temperature (put them in a bowl with hot water). 

4. When there is about 30 seconds left for the yeast, mix in the warm milk, eggs, and oil. Then pour the yeast into the food processor and  mix for one minute, until a dough forms. 

5. Gently pour the bread into the loaf pan, then carefully fold in the cranberries. 

6.   Bake for 45 minutes, or until done (to test with a toothpick, poke it in the center of the bread. If the tooth pick is clean, it its done. If it has dough on it, set the timer for another 5 minutes and check again). 

7. Let cool for 20 minutes, then slice and serve. 


~I hope you enjoy this fall treat as much as my family does!


Sunday, September 29, 2013

{Coconut Cobbler}

Three day weekends are seriously the best. I just need that one extra day to catch up and sort of have an opportunity to relax before the whirlwind of life begins again. However, I'm usually terrible about relaxing and using that extra day to do something fun. But this time I did it. My friend Maddie came over and we continued our tradition of making coconut cobbler. First, before I tell you how incredible coco cobbler, as we nicknamed it, is, let me tell you the background story of this magnificent creation. 


Last year during the cross country season, Maddie invited me over to her house to cook me a meal. Now, as a person with many allergies and severe consequences following contamination, I don't let anybody cook my food. Not even my mother! So Maddie, being the amazing friend she is, decided I needed to face my fears in her very clean, Italian,  and "safe" kitchen. First, we made a kelp noodle stir fry with turkey meat, which was delicious. And safe. Then we experimented with a "dessert," since no Italian meal is complete without sweets. 
 
{Maddie enjoying our Coconut Cobbler}


And thus emerged Madney's Coco Cobbler, the most delicious dessert in the entire world.  Seriously, we are obsessed with this stuff! Gooey, moist, and delicious, and topped with fresh fruit and coconut sugar, this is a treat that you can feel good about eating.  Whenever I finish eating it, I feel like I could die and go to heaven well content. When you make this, be sure you only make as much as you can still maintain self control- yes, its that tempting!


Now back to the coconut sugar. Maddie and I go nuts over this stuff. I know, it sounds weird, but the only way I can think to describe it is like brown sugar meets maple sugar, but richer and better. Anyway, its delicious, and good for you. Coconut sugar is low glycemic, only a 35 on the glycemic index, which is good news for me, since I have a very low tolerance to sugar (even certain fruits make me sick!). I'll admit, I have eaten coconut sugar by itself- its THAT good!!! Maddie even bought me my own coconut sugar for my birthday! 


I promise this is worth your while. It is easy, simple, and delicious! Making coconut cobbler is not only fun, but a great social opportunity, whether you make it with friends, siblings, or kids. I hope you begin your own coconut cobbler traditions of your own!

{COCONUT COBBLER}

 Serves 2
Ingredients:

4 Tablespoons coconut flour
*2 flax "eggs" 
1/4 teaspoon cinnamon
1 Tablespoon coconut sugar
1/4- 1/3 cup of water

Instructions:
 Preheat the oven to 375 degrees.

Mix coconut flour, flax "eggs," cinnamon, coconut sugar together in a medium sized bowl. Add the water, beginning with 1/4 cup, and slowly adding more while mixing until it reaches a doughy consistency. 

Spoon the batter into mini loaf pans, a small cobbler bowl, or muffin tins and bake for 20-25 minutes, until cooked through and firm.

Carefully divide the cobbler into bowls and top with fruit, jam, coconut sugar, extra cinnamon- get creative


*Flax eggs: for the equivalent of one egg, mix 1 Tablespoon of flax meal and 3 Tablespoons of warm water, then let it set for 10 minutes


Monday, September 2, 2013

{Flaxjacks Revisited: A Zucchini Twist}


As I've entered the cross country season, I've fashioned a high-vegetable, Whole 30 sort of diet to increase my nutrient intake, and hopefully positively affect my racing. Since most of my breakfasts revolve around  a little bit of fruit, I've decided to amp up my flax jacks. I mean, I can't have a green smoothie everyday!


Thus, enter zucchini flax jacks. Using the same basic recipe as my original flax jacks, I included some various variations so you can choose, along with the zucchini addition.


First, I tried blueberry-zucchini flax jacks, increasing the amount of cinnamon by a smidge and adding in a few fresh blueberries from Trader Joes in the batter. After the flax jacks cooked, I sprinkled some more berries on top. Yum-yum, those were good! 


Then I decided to try a fall edition by adding some diced apples to the flax jacks for an apple-cinnamon twist. With 1/4 teaspoon of nutmeg, 1/4 teaspoon more of cinnamon, and about 1/4 cup of diced apples (depending on how apple-y you like your fall flax jacks), this edition was a delicious way to wake up. I mean, apple, cinnamon, and nutmeg are a perfect fall combination, awakening memories of cozy evenings with tea, classic music, and a good book.

Pulled from a previous recipe of orange-banana-zucchini bread, I decided to add in 1/2 teaspoon of orange zest for a citrus zing. It's fun to mix it up!

Feel free to make your own combinations, like cranberry-orange and banana-cinammon  Most of the fun is found in being creative and trying new things, so enjoy the process!


~ZUCCHINI FLAX JACKS~


Ingredients:

1/2 cup coconut flour
1 teaspoon baking soda
 1/2 teaspoon cinnamon
4 flax eggs (see below)
1/4-1/3 cup water, almond milk, or coconut milk

 1/2 cup shredded zucchini

{Flax eggs}
To make the equivalent of one egg, combine one tablespoon of flax meal with three tablespoons of hot water. Stir and set aside for ten minutes.

Instructions:

Combine the coconut flour, baking soda, and cinnamon together in a medium-sized bowl. Add in the flax eggs and stir until everything is thourgoughly mixed. Slowly add in the water and zucchini, stirring at the same time, until the mixture turns to batter.

Pour batter into the skillet in tablespoonfuls over medium-high heat. Cook on the first side for about five minutes, then flip and continue cooking until desired.   


Sunday, September 1, 2013

{Spectacular Spanish "Rice"}

Summer is now over and the college application process has begun! I'm almost done with my first one- actually I am, but honestly pushing "submit" is the most terrifying thing in the world, so I'm avoiding it at all costs. Seriously, I'm having mini panic attacks and arguments in my head!

Now that I'm a senior in high school, I'm transitioning to adulthood, learning about how to live on my own. With that comes learning how to cook on my own, and be creative in an affordable way. As the summer ended, so did my time to cook and experiment, which has also led me to try quick and easy recipes. That said, this recipe is quick, easy, and affordable, not to mention DELICIOUS!

In our household, my family cannot survive a week without at least one Mexican dinner. Before going Paleo plus, I would always have a taco salad and Spanish rice. Then I'd have Spanish rice for lunch the next day. And as a snack. And for lunch. And when it was all gone, I'd wait in anticipation for the next Mexican dinner. That said, when I cut out grains, I was severely jealous, eating my skimpy salad as I savored the smell of that forbidden rice. 

Even as I made dishes with cauliflower "rice," I didn't even think of trying to make a Paleo plus edition of Spanish rice, for it was forcibly pushed out of my memory. Then, as I experimented new veggie recipes and learned my new desire for spice, memories of that delicious dish of old came flooding back and I KNEW I had to see if I could resurrect this old love. 
 

Need I say I was successful?!? O I wasn't sure what to expect, but when I put a steamy spoonful into my mouth, I was almost afraid because it tasted like I remembered. How could cauliflower be made to taste so delicious?!? What made it even better, is it took about ten minutes of actually doing something before it cooks. So as the cauliflower cooked, I was able to do homework (exciting right?). 


Coming up with the "Spanish" part of the dish was complicated. I did not want to spend time making my own salsa, or the money for fresh tomatoes. Instead, I used Trader Joe's Fired Diced Tomatoes because peppers and spices are added for a spicy decadence. If you do not use this option, I recommend using another spicy canned tomato sauce, or adding in some red peppers, a little chili pepper with fresh or canned tomatoes.


This can be served as a side dish, as a snack, or even used as a base for a chicken/vegetable entree. Now its quick, easy,delicious, affordable, economic, and versitle! Can it get any better?!

I hope you come to enjoy this favorite as much as I do! 


~SPANISH RICE~


Ingredients:

Coconut oil
1 can Fire Roasted tomatoes, pureed
6 ounces tomato paste
4 cloves of garlic, pressed or minced
1/2 cup chicken broth
1 cauliflower, chopped into florets

Instructions:

Heat coconut oil in the bottom of a pan on medium high. Grind cauliflower in a large food processor. Pour into the pan and cook until slightly browned, about 10 minutes. Add in garlic and cook until fragrant, about 15 seconds. Slowly add in the pureed tomatoes and tomato paste (be careful- it may splatter). Stir until well-incorporated, then add in the chicken broth. 

Cover the pan, lower temperature to medium, and cook for 35 minutes. When the time is up, stir the cauliflower, and if there is still substantial liquid, cook for about 5 minutes more. 

Serve and enjoy!