Oftentimes, life can turn out so differently from what we anticipate. We begin on one path, sure of our direction, only to look back awhile later in awe over the curvy path that has been created. And thus, this is where I now stand, in the crux of circumstances and events, reflecting over my journey thus far.
When I began this blog, I desired to record my health journey, and sought to bring healing to others through my adventures. I began with a problem, a desire, and passion to fix the circumstances that I had been given. As I was met with each dietary struggle, I sought to conquer it through my creativity, which I enjoyed sharing with the world. I enjoyed each moment of creating, imagining, and sharing with others what I learned in the kitchen. As with anything I do, I fully immersed myself in this task, convinced that I would do it with one hundred and ten percent effort.
Now, I recognize that desire soon consumed my life. My struggle against my dietary limitations became obsessive and seeped into every part of my life. It coated my conversations, became a coping mechanism, allowed me to help others through my experiences, and made time slip away.
I sought to bring healing to others, but in the midst of it, I lost my own health. I sought to advise people on healthy living, but neglected to listen to the truth I proclaimed. I became so consumed with searching for a way to manage my diet, that in the midst of it, that I let my dietary restrictions have power over, and take away my life.
I realize now that I need to bring healing to myself, and part of that healing is to resign from my self-made position as a health coach through this blog. It has been fun sharing with the world my creations. It has been a blessing to be able to write about something I loved. There were moments of joy, as something I experimented with, after numerous failures, became a success. I learned many important life lessons in the kitchen, such as patience, accuracy, creativity, and the freedom to imagine.
But now I need to let go of the past, for the obsession that my search for "health" became is unhealthy. If I am to succeed in the goal I sought to obtain when I began this blog, of encouraging a healthy lifestyle, and if I am truly going to be the example that I claimed to be, I need to say goodbye. I'm learning the art of moderation, of letting go, and what true healthy looks like. I am exposing the lies, and seeking true health in every aspect of life.
So, goodbye. Goodbye to days spent agonizing over ingredients. Goodbye to the piles of reciepe ideas. Goodbye to the moments spent imagining new ideas. Goodbye to the stress of a severely restricted diet. Goodbye to the role of diet adviser, counselor, and helper. Goodbye to obsessive habits, and any strings that I could seek to cling to. As much as it pains me, I'm saying goodbye to these memories, and hello to the life ahead.
Hello to the healing that has begun in my body and in my mind. Hello to freedom, hello to a life beyond food. Hello to simple moments of joy that have been missed. Hello to true health, found in a lifestyle of balance and moderation. Hello, Life.
Sunday, July 13, 2014

Monday, February 17, 2014
{Spaghetti Squash Shrimp Creole}
Happy Monday everybody! It is a beautiful day, and even more beautiful because there is no school this week. That means I get to catch up on some homework, prepare for track season, and COOK!
I have been so inspired by all the 21 Day Sugar Detox and Whole 30 recipes that are circulating the internet. That said, after trying to figure out what to do for dinner with an end-of-the-week refrigerator and a spaghetti squash, I decided on this spicy seafood delicacy.

This is definitely my new favorite way to eat spaghetti squash. I love all things with tomato, and this is certainly no exception. It is really easy to make, and a delicious creation. I only made enough for myself, but this recipe is easily adjustable to an amount to feed more mouths. Simply increase ratio if cooking this for more than one serving or for making more than one batch.
One of my favorite parts of this recipes it that I have another excuse to use more bone broth. It is so yummy and so good for my health. I have added it as a regular part of my Paleo plus/21DSD/Whole 30 lifestyle. I have seen significant improvement in my health since following a 21 DSD and Whole 30 diet for about 3 months. I'll admit, I do sometimes eat more fruit than I should- which is still only two servings in a day instead of the usual five servings per week. With so many vegetables and healing recipes, I feel so energized, healthy, and great. This shrimp creole is a new staple in my favorite recipes!
I hope you enjoy this yummy seafood delight!

1/2 spaghetti squash, baked
1 teaspoon coconut oil
1/2 cup green pepper, chopped
1/4 cup celery, chopped
1 garlic clove, minced or pressed
1/2 teaspoon oregano
1/2 teaspoon paprika
1/4 teaspoon homemade taco seasoning
1/2 cup bone broth or chicken broth
4 ounces tomato paste
3 ounces cooked shrimp
Instructions:
1. Begin by baking the spaghetti squash, cut in half and with seeds removed, at 375 F for 35 minutes.
2. While the spaghetti squash is baking, heat coconut oil in a non-stick pan. Add green pepper and celery. Saute until softened, about 5 minute.
3. Next, add the tomato paste, bone broth, paprika, oregano, taco seasoning, and garlic to the pan, mixing thoroughly. Cover the pan and allow to simmer for 20-30 minutes. If you desire a thinner sauce, add water or more broth. If you like a thicker sauce, add coconut flour, a teaspoon at a time.
4. Remove the baked spaghetti squash from the oven and "spaghetti" it with a fork. Put the spaghetti in the pan, mixing to coat with the sauce.
5. Finally, add the prepared shrimp and let it all cook together for at least 5 minutes.
6. Serve and enjoy!
I have been so inspired by all the 21 Day Sugar Detox and Whole 30 recipes that are circulating the internet. That said, after trying to figure out what to do for dinner with an end-of-the-week refrigerator and a spaghetti squash, I decided on this spicy seafood delicacy.
This is definitely my new favorite way to eat spaghetti squash. I love all things with tomato, and this is certainly no exception. It is really easy to make, and a delicious creation. I only made enough for myself, but this recipe is easily adjustable to an amount to feed more mouths. Simply increase ratio if cooking this for more than one serving or for making more than one batch.
One of my favorite parts of this recipes it that I have another excuse to use more bone broth. It is so yummy and so good for my health. I have added it as a regular part of my Paleo plus/21DSD/Whole 30 lifestyle. I have seen significant improvement in my health since following a 21 DSD and Whole 30 diet for about 3 months. I'll admit, I do sometimes eat more fruit than I should- which is still only two servings in a day instead of the usual five servings per week. With so many vegetables and healing recipes, I feel so energized, healthy, and great. This shrimp creole is a new staple in my favorite recipes!
I hope you enjoy this yummy seafood delight!
{Spaghetti Squash Shrimp Creole}
Serves 1
Ingredients:1/2 spaghetti squash, baked
1 teaspoon coconut oil
1/2 cup green pepper, chopped
1/4 cup celery, chopped
1 garlic clove, minced or pressed
1/2 teaspoon oregano
1/2 teaspoon paprika
1/4 teaspoon homemade taco seasoning
1/2 cup bone broth or chicken broth
4 ounces tomato paste
3 ounces cooked shrimp
Instructions:
1. Begin by baking the spaghetti squash, cut in half and with seeds removed, at 375 F for 35 minutes.
2. While the spaghetti squash is baking, heat coconut oil in a non-stick pan. Add green pepper and celery. Saute until softened, about 5 minute.
3. Next, add the tomato paste, bone broth, paprika, oregano, taco seasoning, and garlic to the pan, mixing thoroughly. Cover the pan and allow to simmer for 20-30 minutes. If you desire a thinner sauce, add water or more broth. If you like a thicker sauce, add coconut flour, a teaspoon at a time.
4. Remove the baked spaghetti squash from the oven and "spaghetti" it with a fork. Put the spaghetti in the pan, mixing to coat with the sauce.
5. Finally, add the prepared shrimp and let it all cook together for at least 5 minutes.
6. Serve and enjoy!
Saturday, January 4, 2014
{Berry Coconut Yogurt}
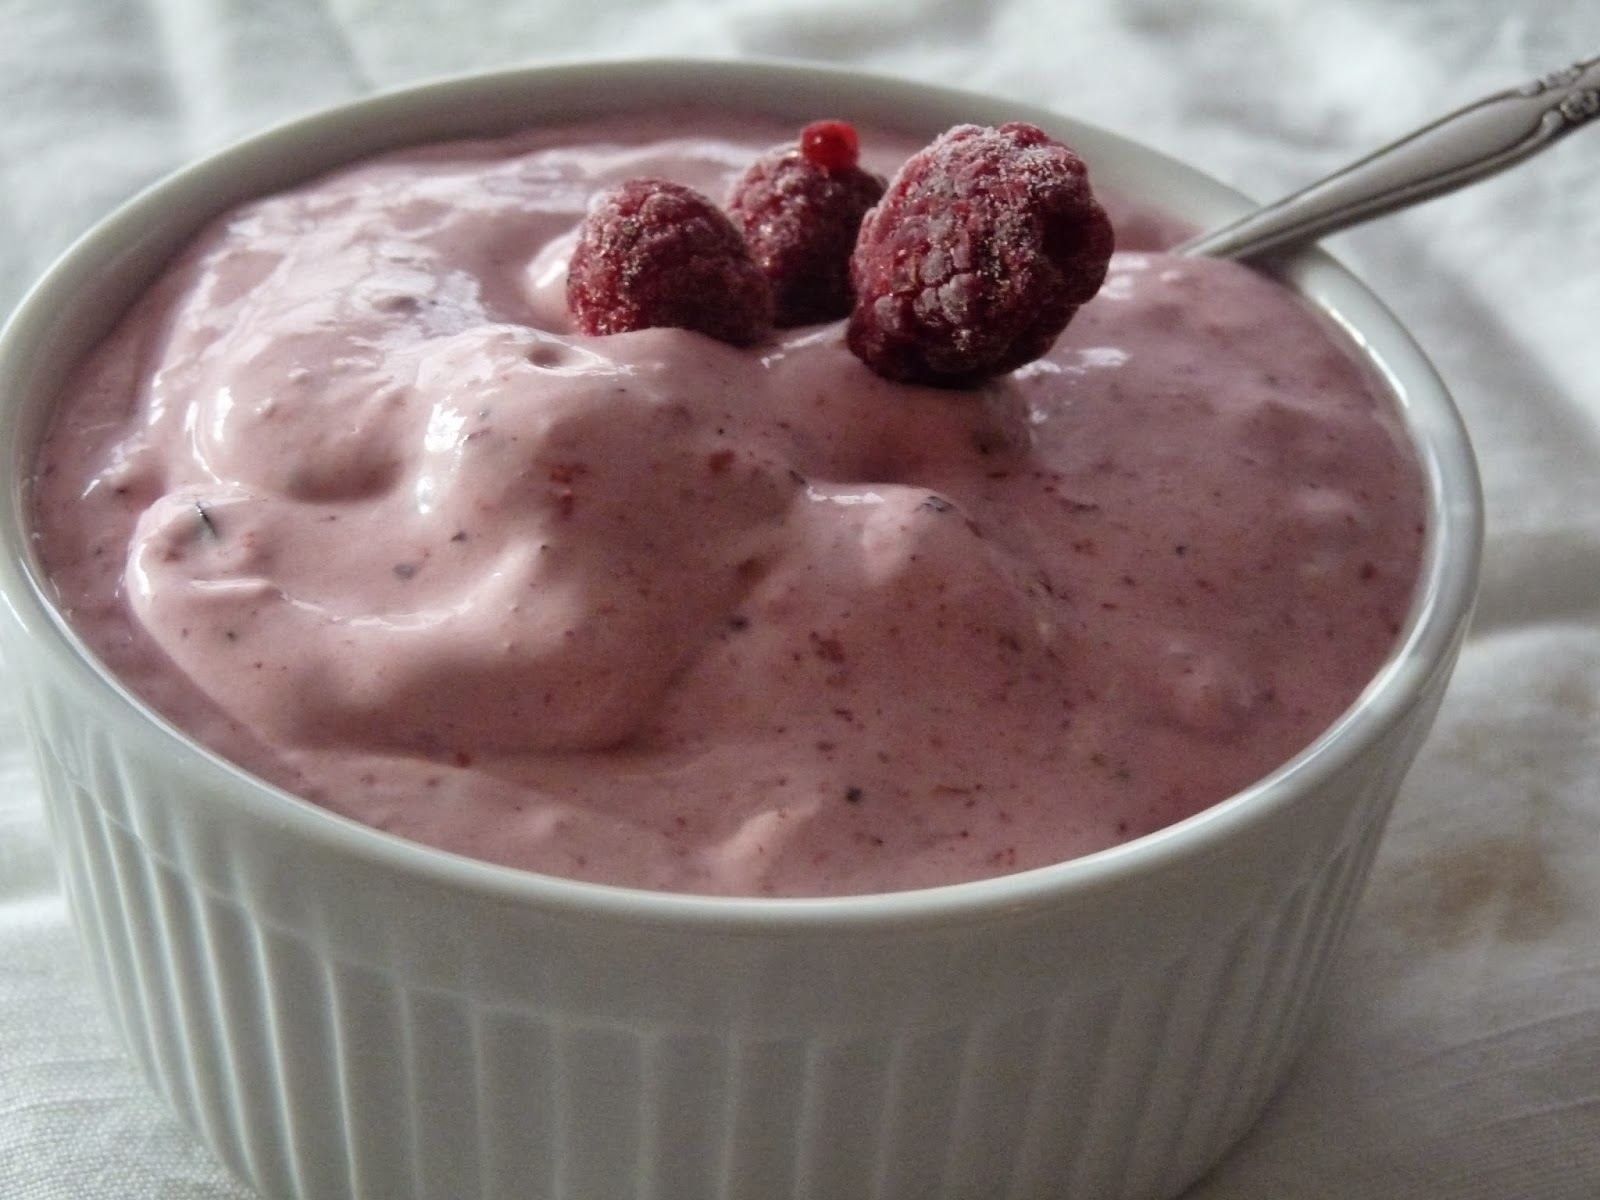
I finally made coconut yogurt!!!!!!! I have been craving this stuff so long!! I used to eat coconut yogurt everyday until I cut out all grains, because the conventional companies use rice starch as a binder. Ugh! So for about 2 years, I have been craving yogurt, drooling whenever my brother eats his Yoplait, dreaming of the coconut yogurt I used to have.
But now I've made it and the wait is over! "Yum" is not enough to describe the joy I felt when I took a savory bite of my yogurt this morning. Maybe sweet victory is closer...
Using a Christmas gift of Great Lakes grass-fed gelatin, I was finally able to make my coconut yogurt. I've been researching a lot about gelatin and how to make allergy-friendly yogurts, and this brand kept popping up. So far, my body is loving it! I also made fruit gummies the other day. They weren't as delicious as my yogurt, but they sure were a nice snacky treat. Though this yogurt doesn't have cultures (because frankly, they are way out of my budget), the gelatin is said to help digestion, along with strengthening and supporting joints. As a runner, I need all the joint support I can get! :)
Furthermore, this yogurt does not require a fancy yogurt maker. All you need is a saucepan and a food processor!
Another thing that makes this yogurt so great is that it is sugar and sweetener free!! If you are able to have sweeteners, add a bit of honey. But if you're like me and avoiding sugar like the plague, you may just jump for joy. :)
For my yogurt, I blended in berries, but you can certainly omit that step and have plain yogurt. Other options include sprinkling your favorite granola on top, making parfaits, adding a bit of vanilla extract for a vanilla version, or add some seeds and shredded coconut for an extra protein punch. Be creative- it is your grain-free, unprocessed, homemade yogurt! Be proud! :)
{BERRY COCONUT YOGURT}
for a single serving
INGREDIENTS:
1 cup coconut milk (I used Trader Joes' canned light coconut milk), divided
1- 1.5 teaspoons gelatin (depending on desired thickness)
Juice of 1/2 a lime
1/4 cup berries, frozen or fresh
INSTRUCTIONS:
Heat 3/4 cup of the coconut milk in a small saucepan over medium-low heat. In a bowl, combine the gelatin and rest of the coconut milk (1/4 cup) until it forms a smooth paste. Add the paste and lime juice to the coconut milk in the sauce pan, constantly whisking the ingredients until they are smooth and thoroughly combined.
Pour the coconut yogurt into a container and let it chill in the refrigerator for one hour up to overnight.
Once chilled, place the yogurt and the berries in a food processor and blend until creamy and smooth. Serve and enjoy immediately with toppings or as is.
*If the coconut yogurt is too thick for your taste once is chilled, add water until it reaches desired consistency.

Wednesday, January 1, 2014
{Parsley-Basil Kelp Noodles with Broccoli and Chicken}
Happy New Year! I'm starting 2014 off right with a Whole 30/21DSD/AIP combo. NOT a diet, or a detox, but a readjustment. I've found myself snacking on more fruit than I would like, and occasionally drifting to dried fruit when I was hungry and looking for a quick go-to snack. I know, hand-slap! So not only am I doing this combo readjustment to rid myself of sugar, but also to heal my gut. Lately, it has taken a beating with cross-contamination from my family's "un-Sydney-friendly" kitchen and baking, despite drastic efforts. However, as the only one who has severe reactions, I've suffered the brunt og Christmas baking. I mean, if I'm going to feel sick, I'd like to actually eat something good, not just get sick off of cross-contamination!!
Anyway, so far I am enjoying this readjustment because it has sparked a refreshing new creativity in cooking. After only one day, I'm feeling a whole lot better! I'm excited to see how I feel after a month. I'm not really sure what I'll do after a month, but since it is a readjustment, I'm sure I'll continue this lifestyle, with room for some treats here and there. But mostly I'll stick to just eating the good stuff, like my beloved vegetables! :)

This kelp noodle bowl was absolutely delicious! Besides the pesto, it's kind of a loose recipe because I threw in some plain chicken leftover from another time and pre-chopped broccoli from my zoodles and broccoli. Feel free to add lemony chicken, spicy chicken, or other meats for some variety!

There will be plenty of pesto leftover for other days and other recipes. I'm so glad that I found a pesto recipe that is nut-less (because I can't have nuts...) and not chunky. Today for lunch I plan on eating zoodles with pesto! I hope you enjoy this as much as I do!
INGREDIENTS:
1/4 package kelp noodles (about 1 cup)
1/4 cup fresh broccoli, chopped into little florets
Chicken, however much you like, prepared however you like, and chopped
* I think I used roughly about 1/4 cup of chicken
For the Parsley-Basil pesto-
1 cup fresh parsley
handful of fresh basil (about a 1/2 cup)
1/4- 1/3 cup olive oil (add more or less depending on how thick/thin you want)
1 Tablespoon lemon juice
1/4 teaspoon salt
pepper to taste
INSTRUCTIONS:
Boil kelp noodles and chopped broccoli until both are softened, about 10 minutes.
While the kelp noodles are cooking, begin making the pesto. In a food processor, combine the pesto ingredients and process until smooth, adding more oil if needed.
Drain the kelp noodles and broccoli and place in a bowl. Add about a tablespoon of pesto (depending on how much kelp noodles/broccoli you used) to the noodle bowl and stir until evenly coated. Enjoy!!
Anyway, so far I am enjoying this readjustment because it has sparked a refreshing new creativity in cooking. After only one day, I'm feeling a whole lot better! I'm excited to see how I feel after a month. I'm not really sure what I'll do after a month, but since it is a readjustment, I'm sure I'll continue this lifestyle, with room for some treats here and there. But mostly I'll stick to just eating the good stuff, like my beloved vegetables! :)


This kelp noodle bowl was absolutely delicious! Besides the pesto, it's kind of a loose recipe because I threw in some plain chicken leftover from another time and pre-chopped broccoli from my zoodles and broccoli. Feel free to add lemony chicken, spicy chicken, or other meats for some variety!

There will be plenty of pesto leftover for other days and other recipes. I'm so glad that I found a pesto recipe that is nut-less (because I can't have nuts...) and not chunky. Today for lunch I plan on eating zoodles with pesto! I hope you enjoy this as much as I do!
INGREDIENTS:
1/4 package kelp noodles (about 1 cup)
1/4 cup fresh broccoli, chopped into little florets
Chicken, however much you like, prepared however you like, and chopped
* I think I used roughly about 1/4 cup of chicken
For the Parsley-Basil pesto-
1 cup fresh parsley
handful of fresh basil (about a 1/2 cup)
1/4- 1/3 cup olive oil (add more or less depending on how thick/thin you want)
1 Tablespoon lemon juice
1/4 teaspoon salt
pepper to taste
INSTRUCTIONS:
Boil kelp noodles and chopped broccoli until both are softened, about 10 minutes.
While the kelp noodles are cooking, begin making the pesto. In a food processor, combine the pesto ingredients and process until smooth, adding more oil if needed.
Drain the kelp noodles and broccoli and place in a bowl. Add about a tablespoon of pesto (depending on how much kelp noodles/broccoli you used) to the noodle bowl and stir until evenly coated. Enjoy!!
Saturday, December 28, 2013
{Spaghetti Squash Vegetable Bake}


This new recipe came about because we had squash, vegetables, and chicken, and we needed dinner. Thankfully I discovered a wonderful creation from the end of the week "leftovers" of the cupboard! It was so fun to whip something together and be a bit creative. I am so excited that my little last minute experiment turned out so well.
Spaghetti squash is one of my favorite vegetable staples. I can use it for any meal in almost anyway. I've made spaghetti squash hash-cakes, "spaghetti" and meatballs, and now this bake! As I've mentioned before, I'm going crazy with love for vegetables, so of course I took this opportunity to add as much vegetables as I could. I probably would have added more, but I went a little easy for my not-so-vegetable-loving family :)
Perhaps the greatest achievement of this dish is that my whole family absolutely loved it. Even my papa, who dislikes vegetables ate two helpings! Today for lunch, instead of his favorite taquitos, my dad had some for leftovers! That's like the ultimate compliment when my family gobbles up my creations! :)

This bake is so easy and a true crowd-pleaser for all ages. Feel free to add in different vegetables. If I had cauliflower, I would have added some "riced" cauliflower for more vegetable goodness.
May your family fall in love with this vegetable bake as much as mine did! :)
{SPAGHETTI SQUASH VEGETABLE BAKE}
INGREDIENTS:
1 medium spaghetti squash, baked
1 chicken breast, cooked and chopped to chunks
16 ounce can of crushed tomatoes
6 ounce can tomato paste
1/4 cup vegetable broth
1 cup fresh spinach, washed
1/4 cup broccoli, chopped into small florets
1/4 cup carrots, chopped
4 leaves of fresh basil, chopped
salt and pepper to taste
INSTRUCTIONS:
Heat the oven to 375 F. Wash and cut the spaghetti squash into two halves. Remove the seeds (save the seeds if you want to roast them later!). Once the oven is ready, bake the squash in the oven, face up for 35-40 minutes, depending on the size of your squash.
Meanwhile, as the squash bakes, prepare the chicken either by baking it in the oven or cooking in a skillet. Prepare the vegetables.
In a large bowl, combine the vegetables, vegetable broth, tomato paste, tomatoes, basil and cooked chicken. Once the spaghetti squash is done, remove the "spaghetti" with a fork, placing the strands in the large bowl. Mix it all together, making sure everything is evenly incorporated.
Place everything in a glass 9x13 baking dish, pressing down and evenly spreading out. Bake at 375 F for 35 minutes.
Serve and enjoy!
Thursday, December 26, 2013
{Zoodles with Homemade Tomato Sauce and Vegetable Meatballs}

Can I just say, the spiralizer is AWESOME!!! I absolutely love it!! I cannot wait to try it with many different vegetables. If you don't have one, you should definitely get one. Christmas is only 364 days away.. :)
Anyway, back to my little lunch. One word- DIVINE!! The zoodles were soft to perfect, harking back memories of my pasta days. The fresh basil in the tomato sauce perfectly complimented this Paleo Italian meal. I'm still drooling a bit as I write this. It was so good. I think I may have it for dinner too. And breakfast. And lunch.
The tomato sauce and vegetable meatballs were really moments of creative genius. I'm usually not that ambitious, just making stuff up without a framework or some idea of what I am doing, but I saw vegetables and canned tomatoes and went for it!
Since I've been sugar free for about a month, it has been really hard finding tomato sauces without sugar. Even the organic ones have agave syrup! So I decided if I wanted to have something sugar free, I had to make it myself. Homemade pasta sauce is not really that hard, its easy, its sugar free, and it maybe is even less expensive. So If you are looking for a sugar free option for tomato sauce, I suggest making your own.
I have made the vegetable meatballs before for my family over spaghetti squash, but I haven't posted it until now. So sorry! They are truly delicious!
My inspiration came from a time when I was flipping through our six TV channels (which NEVER happens!) and I saw a cooking show. The chef was teaching a family how to eat gluten free and suggested adding cooked rice to the meat. Of course I thought, instead I can use cauliflower and vegetables and get the same effect with for a Paleo option with more nutrition.
That was a moment of brilliance, for I get more vegetables (yay!!!) while using less meat at one time. Feel free to add in other vegetables with the carrot and spinach mix, such as kale or zucchini, being sure it grinds well.
Since only I ate this, I made a single serving. I made the full recipe for the tomato sauce, but only used as much as I desired to coat the zoodles from one zucchini (which was just 1/4 of the whole tomato sauce recipe). For the meatballs, I only used about 5 carrots, a small handful of spinach, and a spoonful or two of riced cauliflower with just under a 1/8 pound of ground turkey.
I hope you enjoy this new favorite as much as I do! May your cravings fro pasta be satisfied by this healthier delicious dish!
INGREDIENTS:
4 Zucchini, spiraled using a spiralizer, or julienne peeler1 head of broccoli, chopped into florets
For the Homemade Tomato Sauce-
28 ounce can of crushed tomatoes
6 ounce can of tomato paste
1 clove garlic, pressed
3 leaves of fresh basil, washed and chopped
3/4 teaspoon dried oregano
salt and pepper to taste
For the Vegetable Meatballs-
1/2 cup spinach
15 baby carrots
1/2 cup riced cauliflower
1 pound ground turkey meat
3/4 teaspoon dried oregano
INSTRUCTIONS:
Begin by preparing the Homemade Tomato Sauce, placing the crushed tomatoes and tomato paste in a nonstick skillet. Then, add the garlic and herbs. Cook for about 10 minutes over medium heat, allowing it to simmer. Set aside.For the meatballs, using a food processor, grind the carrots and spinach into pieces. In a bowl, combine the turkey, ground carrots and spinach, cauliflower, and oregano. Then, form into meatballs. Place the meatballs in another skillet until thoroughly cooked through.
While the meatballs cook, prepare the zucchini and broccoli. Then, add the broccoli to the simmering tomato sauce and cover to steam the broccoli. Next, when the meatballs are almost done, add the zucchini to the pan with the tomato sauce, and cover the pan to breifly soften the zucchini.
After one minute, remove the cover from the pan with the tomato sauce and zucchini and add the meatballs. Mix thoughoughly, adding more salt and pepper if desired.
Serve and enjoy!
Sunday, December 22, 2013
The How-To's: Cauliflower Rice
I decided to begin a series of "how-to's" to explain the best way for making certain staples in my diet. So join me as I go back to basics and share what I cook up in the kitchen on a regular basis!
I began with my latest favorite, cauliflower rice. This amazing version of the vegetable is great to have on hand throughout the week. I usually make a large batch at the beginning of the week so that I can have it on hand.
I like to add riced cauliflower to many meals to add an extra dose of vegetables and nutrients. Riced cauliflower is simple to make, and when made right, makes a world of difference!
Cauliflower rice can take on almost any variation. Some of my favorites are lettuce wraps with cilantro-lime cauliflower rice and guacamole. Another recent is a tuna salad topped with guacamole and cauliflower rice. Last night, I made vegetable meatballs, and added the extra cauliflower rice I had on hand.

Next, using the grater attachment of the food processor, "rice" the cauliflower. This is somewhat tedious, putting in all the baked florets, but well worth the effort.


After the cauliflower is riced, use immediately, or store to use for later.
Voila! Your cauliflower is properly riced!!


I began with my latest favorite, cauliflower rice. This amazing version of the vegetable is great to have on hand throughout the week. I usually make a large batch at the beginning of the week so that I can have it on hand.
I like to add riced cauliflower to many meals to add an extra dose of vegetables and nutrients. Riced cauliflower is simple to make, and when made right, makes a world of difference!
Cauliflower rice can take on almost any variation. Some of my favorites are lettuce wraps with cilantro-lime cauliflower rice and guacamole. Another recent is a tuna salad topped with guacamole and cauliflower rice. Last night, I made vegetable meatballs, and added the extra cauliflower rice I had on hand.
{A Step-by-Step Guide to Make Cauliflower Rice}
Begin by washing the cauliflower and preheating the oven to 400 F. Chop into florets and place evenly on a baking sheet. Bake in the oven for 30 minutes, or until softened.

Next, using the grater attachment of the food processor, "rice" the cauliflower. This is somewhat tedious, putting in all the baked florets, but well worth the effort.


After the cauliflower is riced, use immediately, or store to use for later.
Voila! Your cauliflower is properly riced!!


Lettuce Wraps with Cilantro-Lime Cauliflower Rice and Guacamole
Sunday, December 8, 2013
{Vegetable Sweet Potato Tuna Casserole}
I am really loving my vegetables. I have never felt so good or so healthy in my entire life! It's amazing what eating real and nutritious food can do! I've been on a Whole 30-type diet (no sugar except that little bit in the ketchup I sometimes eat) in attempt to make it a lifestyle, and I can honestly say, I DON'T LIKE SUGAR ANY MORE! Even fruits, I'm not desperately craving! I am so much more content with my vegetables, and actually crave them. Call me crazy, but honestly, I have never loved vegetables so much as I do now!
Seriously, I saw an autoimmune Paleo dessert idea on Pinterest and thought "I like my vegetables more." I don't know if that's beyond weird, but I challenge you to find your inner love for vegetables. Don't feel like you have to go on a vegetable craze like me, or even crave them, but just see what adding more vegetables and wholesome, grown-in-the-ground ingredients can do!
That said, I attempted a cozy casserole last night because it was stormy. I wanted soup, but we had no vegetable broth, so casserole it was.

And can I say it was a delicious decision! I ate it all, no shame. It hit the spot on a stormy winter night! I'm definitely adding this to my list of favorites. It has my vegetables- I think next time I'll add more :)
I only used a 1/2 can of tuna because only I ate it, but feel free to multiply ingredients to the desired serving amount. I hope you enjoy this creation as much as I do!
Ingredients:
1/4 cup light coconut milk
1 teaspoon coconut flour
1 teaspoon dried rosemary or 1/2 Tablespoon fresh rosemary
1 Tablespoon chicken broth
2 tablespoons lemon juice
1/2 of a 6 ounce can of tuna
1/4 cup fresh broccoli, chopped
1/4 cup "riced" cauliflower
3/4 cup grated sweet potato
salt and pepper to taste
Instructions:
In a pot, whisk together the coconut milk and coconut flour and bring it to a boil. Reduce to a simmer and then add the lemon juice, chicken broth, and rosemary.
In a bowl, combine the tuna, broccoli, cauliflower, and sweet potato. Pour the coconut milk sauce over and stir until thoroughly incorporated.
Place in a baking dish (I used two ramekins) and bake at 375 for approximately 25 minutes (depending on the size of you baking dish and casserole).
Remove and serve!
*If you're not a tuna lover, feel free to substitute it with salmon, chicken, turkey, or whatever you want. And feel free to experiment with different vegetables- next time, I' going to try some kale with it :)

Seriously, I saw an autoimmune Paleo dessert idea on Pinterest and thought "I like my vegetables more." I don't know if that's beyond weird, but I challenge you to find your inner love for vegetables. Don't feel like you have to go on a vegetable craze like me, or even crave them, but just see what adding more vegetables and wholesome, grown-in-the-ground ingredients can do!
That said, I attempted a cozy casserole last night because it was stormy. I wanted soup, but we had no vegetable broth, so casserole it was.

And can I say it was a delicious decision! I ate it all, no shame. It hit the spot on a stormy winter night! I'm definitely adding this to my list of favorites. It has my vegetables- I think next time I'll add more :)
I only used a 1/2 can of tuna because only I ate it, but feel free to multiply ingredients to the desired serving amount. I hope you enjoy this creation as much as I do!
{VEGETABLE SWEET POTATO CASSEROLE}
Ingredients:
1/4 cup light coconut milk
1 teaspoon coconut flour
1 teaspoon dried rosemary or 1/2 Tablespoon fresh rosemary
1 Tablespoon chicken broth
2 tablespoons lemon juice
1/2 of a 6 ounce can of tuna
1/4 cup fresh broccoli, chopped
1/4 cup "riced" cauliflower
3/4 cup grated sweet potato
salt and pepper to taste
Instructions:
In a pot, whisk together the coconut milk and coconut flour and bring it to a boil. Reduce to a simmer and then add the lemon juice, chicken broth, and rosemary.
In a bowl, combine the tuna, broccoli, cauliflower, and sweet potato. Pour the coconut milk sauce over and stir until thoroughly incorporated.
Place in a baking dish (I used two ramekins) and bake at 375 for approximately 25 minutes (depending on the size of you baking dish and casserole).
Remove and serve!
*If you're not a tuna lover, feel free to substitute it with salmon, chicken, turkey, or whatever you want. And feel free to experiment with different vegetables- next time, I' going to try some kale with it :)

Thursday, November 28, 2013
{A Rooted N' Sprouting Thanksgiving}

For the first time in my entire life, we had Thanksgiving at home. Also for the first time in my life, I GOT TO COOK!! It was so much fun!

Of course, I planned everything out to the minute of when to prepare each dish and put it in the oven. I was cooking like a well-oiled machine. Everything was cooked, prepared, and of course photographed by the anticipated time.
And can I say, it was a success. My brother and dad were both drooling, anticipating the deliciousness to come.

This is what happens when you combine a growing teenage boy with a comfort-foodie, Thanksgiving maniac dad, a content and happy-I'm-not-cooking mom, and an AIP conundrum. That basically sums up our Thanksgiving smorgasbord, complete with gluten free and AIP delights. I tried to convince my dad to try a vegetable and Sydney-approved stuffing, but he wouldn't have it. Again, can I say comfort-foodie?!? I had to compromise a little bit, but I got all the vegetables and AIP goodness I wanted :)
The day turned out really well. For never ever having a family Thanksgiving, or much less having me do all the cooking, things came out great. Here's a peek at what we enjoyed:
{Our Menu}
Rosemary TurkeyMashed Potatoes (for the family, with real milk and butter)
Gluten Free Stuffing (homemade, with a little help from Rudi's)
Turnip-Parsnip Mash from Against All Grain
Vegetable Casserole (recipe below)
Gluten Free Apple Crisp
AIP Apple Tartlet (1/8 Autumn Apple Pie recipe)
 |
| THE TURKEY |
 |
| Mashed Potatoes for the boys |
 | ||
| Parsnip-Turnip Mash |
 |
| Gluten Free Stuffing |
 | ||
| Gluten Free Stuffing |
 |
| Vegetable Casserole |
That was dinner. And then came the dessert, a small apple tartlet for me, and a gluten-free apple crisp topped with homemade whipped cream for the rest of the family.
 |
| My tartlet |
 |
| Gluten Free Apple Crisp |

Everything was so delicious and everyone ate a little bit of everything. But my favorite part was the nostalgia of reflecting of what we are thankful for. My brother, of course was thankful for surfing and good food. But we all agreed that we are thankful for God's faithfulness, His provision, and His continued blessing in our lives. Life is good, and, quoting my dad, its nice to pause in the middle of the rat-race of life and be thankful for the good life we do enjoy.
This day was perfect, with pleasant company, delicious food, and plenty to be thankful for. Happy Thanksgiving from our family to yours! :)
{VEGETABLE CASSEROLE}
INGREDIENTS:
For the vegetables-
1 medium spaghetti squash, baked and scraped
1/2 cauliflower, cut into little florets
2 cups butternut squash, chopped into 1/2 inch cubes
2 zucchini, chopped
2 Tablespoons fresh rosemary, minced
1 teaspoon basil
1 teaspoon oregano
salt and pepper to taste
For the creamy cauliflower sauce-
1/2 cauliflower, chopped into florets
1/2 cup of the cauliflower water
4 cloves garlic, pressed or minced
salt and pepper to taste
INSTRUCTIONS:
For the cauliflower sauce-
1. Boil 1/2 cup of water with the cauliflower for 10-15 minutes. Drain the water, reserving 1/2 cup.
2. In a food processor, pulse the steamed cauliflower, 1/2 cup water, garlic, pepper and salt until a creamy consitency is reached.
3. Set aside.
For the cassarole-
1. Preheat oven to 400 F. In a large baking dish, bake the butternut squash, cauliflower, and zucchini for 30-35 minutes. Then reduce temperature to 325 F.
2. As the other vegetables are baking, grease a 9"x13" glass baking dish, then line the bottom with the spaghetti squash.
3. After the other vegetables are done roasting, place on top of the spaghetti squash. Lather the cauliflower sauce over the top, smoothing it evenly across the vegetables.
4. Sprinkle the rosemary on top, then place in the oven for 15 minutes.
5. Remove and let it set for at least 10 minutes, the serve.

Tuesday, November 19, 2013
{Spaghetti Squash Hash-cakes}
Like previously, I've been on a vegetable craze. Seriously, I've never eaten so many vegetables in my life, but I LOVE it and I feel great!
Breakfast can be a challenge to find exciting ways to eat vegetables. I mean, green smoothies can get old after awhile.. But these spaghetti squash hash-cakes are the perfect vegetable breakfast!
I called these hash-cakes, because they have the texture of hash browns, but are like pancakes. So, voila, hash-cakes :)

Infused with the taste of rosemary, these hash-cakes easily please. Even though I bake an entire spaghetti squash, I only use one cup of spaghetti squash per serving. This recipe is great to use if you buy a large spaghetti squash and don't want to use all of it for another recipe, for example "spaghetti" and meatball.

I serve mine with a little bit of ketchup drizzled over the top. If
you're not following an AIP diet, these hash-cakes would go wonderfully
with some scrambled eggs, or even a fried egg in the middle of the
hash-cakes. However you decide to enjoy these, I hope these hash-cakes leave you satisfied and energized!
{SPAGHETTI SQUASH HASH-CAKES}
Ingredients:
1 spaghetti squash
2 teaspoons coconut flour
2 teaspoons fresh rosemary, chopped
1 teaspoon dried basil
pepper to taste
coconut oil
Instructions:
Bake a spaghetti squash at 375 for 40 minutes. When it is done baking, using a fork,
To make one serving of hash-cakes, combine a cup of spaghetti squash with coconut flour and herbs. In a skillet greased with coconut oil, take about 1/4 cup of the spaghetti squash, put it in the pan and smash together until it sticks. Repeat until all the spaghetti squash is cooking in the pan. Cook for about 7 minutes, or until lightly crisped, then flip the hash-cakes and finish cooking for about 5 minutes. Remove from the pan and enjoy!
**If you want to make more than one serving, just increase the amount still using the 1 cup of spaghetti squash to coconut flour/herbs ratio.
**If your spaghetti squash is extra runny and doesn't stick together very well, add more coconut flour. Coconut flour is a drier flour, and easily soaks up extra moisture :)
Sunday, November 17, 2013
{Perfectly Pumpkin Bagels}
I am so excited to finally have a bagel recipe!!!!! Really, jumping-up-and-down excited!!!!
Bagels optimize my inner struggle with my complicated food lifestyle. For 99% of the time, I truly enjoy my diet and love making new creations loaded with vegetables and good healthy nutirents. But sometimes I just want a warm, chewy, scrumptious bagel, lathered in rich cream cheese. I can dream, can't I?
I even wrote a college essay on my "bagels" in life and in running- the time where it is tempting to give up and go for the easier and more temporarily satisfying decision instead of doing what is right for me and my training. Learning to say no to bagels. Sounds like a good book title.
Until now, every time I tried to create a bagel-type of bread, they came out mushy, doughy bites that tasted like flaxseed meal. Not the bagel I had dreamed of.
But now I can say- no, shout YES to bagels. The secret? A little bit of tapioca starch for the classic bagel chewiness, chia seed meal for the "egg" (I've found make chia meal "eggs" actually work better than the classic flaxseed meal egg in my baking experiments), and coconut milk for extra moisture.

I ate mine with a little bit of Trader Joe's delicious pumpkin butter. Although I didn't try it, I thought of making a little bit of coconut whipped cream, sprinkling some cinnamon and some pumpkin butter in it to make pumpkin "cream cheese" to put on top.

1.5 Tablespoons chia meal (chia seeds ground in a coffee grinder)
3 Tablespoons pumpkin puree
2 Tablespoons water
1 Tablespoons apple cider vinegar
3/4 teaspoon xanthan gum
1/4 cup plus 2 Tablespoons coconut milk
1/4 cup coconut oil, melted
1/2 cup tapioca starch
1/2 cup coconut flour
1/2 teaspoon cinnamon
1/4 teaspoon nutmeg (*omit for AIP)
1/4 teaspoon ginger
1/4 teaspoon cloves
1 teaspoon baking soda
1 teaspoon baking powder (* make sure it is corn-free. Or better yet, make your own)
Instructions:
1. Add chia seed meal, pumpkin puree, water, apple cider vinegar,xanthan gum, and coconut milk in an electric blender. In order, add coconut oil, then flours and spices, then baking soda and baking powder, scraping down the sides of the bowl as necessary. Beat until a dough-like mass begins to form.
2. Forming the dough into large balls, depending on how large you want them. I made mini bagels forming balls of dough about the size of two tablespoons. To make larger bagels, I'd suggest forming dough the size of your fist. Poke a hole in the middle of the dough ball and shape to form a bagel using dry hands. Place the bagels on a baking sheet lined with parchment paper.
3. Bake at 350 for about 20 minutes, depending on size of bagels. I made mini bagels, and cooked them for 15 minutes. Allow them to cool for at least 10 minutes before slicing. Enjoy!
Variation Ideas:
*I will be making a few of these shortly and posting them. That said, these are just my ideas, so they haven't been proven yet. But feel free to experiment- it's fun!!!
For all recipe variation ideas, omit pumpkin puree and either replace with unsweetened applesauce or 3 Tablespoons more of coconut milk
Cinnamon Raisin- add 1/4 cup of raisins and 1/2 teaspoon more of cinnamon
Cranberry Orange- add 1/4 cup of dried cranberries (or Trader Joe's orange cranberries) with 1/2 teaspoon of orange zest
Chocolate-zucchini- Add 1/4 cup of shredded zucchini and 2 Tablespoons of cocoa powder
Chocolate chip- add 1/4 cup of EnjoyLife mini chocolate chips
Apple-cinnamon- increase cinnamon, add 1/4 chopped apples.
Bagels optimize my inner struggle with my complicated food lifestyle. For 99% of the time, I truly enjoy my diet and love making new creations loaded with vegetables and good healthy nutirents. But sometimes I just want a warm, chewy, scrumptious bagel, lathered in rich cream cheese. I can dream, can't I?
I even wrote a college essay on my "bagels" in life and in running- the time where it is tempting to give up and go for the easier and more temporarily satisfying decision instead of doing what is right for me and my training. Learning to say no to bagels. Sounds like a good book title.
Until now, every time I tried to create a bagel-type of bread, they came out mushy, doughy bites that tasted like flaxseed meal. Not the bagel I had dreamed of.
But now I can say- no, shout YES to bagels. The secret? A little bit of tapioca starch for the classic bagel chewiness, chia seed meal for the "egg" (I've found make chia meal "eggs" actually work better than the classic flaxseed meal egg in my baking experiments), and coconut milk for extra moisture.


I ate mine with a little bit of Trader Joe's delicious pumpkin butter. Although I didn't try it, I thought of making a little bit of coconut whipped cream, sprinkling some cinnamon and some pumpkin butter in it to make pumpkin "cream cheese" to put on top.
I hope that you enjoy these lovely creations as much as I do!

{PERFECTLY PUMPKIN BAGELS}
Ingredients:
1.5 Tablespoons chia meal (chia seeds ground in a coffee grinder)
3 Tablespoons pumpkin puree
2 Tablespoons water
1 Tablespoons apple cider vinegar
3/4 teaspoon xanthan gum
1/4 cup plus 2 Tablespoons coconut milk
1/4 cup coconut oil, melted
1/2 cup tapioca starch
1/2 cup coconut flour
1/2 teaspoon cinnamon
1/4 teaspoon nutmeg (*omit for AIP)
1/4 teaspoon ginger
1/4 teaspoon cloves
1 teaspoon baking soda
1 teaspoon baking powder (* make sure it is corn-free. Or better yet, make your own)
Instructions:
1. Add chia seed meal, pumpkin puree, water, apple cider vinegar,xanthan gum, and coconut milk in an electric blender. In order, add coconut oil, then flours and spices, then baking soda and baking powder, scraping down the sides of the bowl as necessary. Beat until a dough-like mass begins to form.
2. Forming the dough into large balls, depending on how large you want them. I made mini bagels forming balls of dough about the size of two tablespoons. To make larger bagels, I'd suggest forming dough the size of your fist. Poke a hole in the middle of the dough ball and shape to form a bagel using dry hands. Place the bagels on a baking sheet lined with parchment paper.
3. Bake at 350 for about 20 minutes, depending on size of bagels. I made mini bagels, and cooked them for 15 minutes. Allow them to cool for at least 10 minutes before slicing. Enjoy!
Variation Ideas:
*I will be making a few of these shortly and posting them. That said, these are just my ideas, so they haven't been proven yet. But feel free to experiment- it's fun!!!
For all recipe variation ideas, omit pumpkin puree and either replace with unsweetened applesauce or 3 Tablespoons more of coconut milk
Cinnamon Raisin- add 1/4 cup of raisins and 1/2 teaspoon more of cinnamon
Cranberry Orange- add 1/4 cup of dried cranberries (or Trader Joe's orange cranberries) with 1/2 teaspoon of orange zest
Chocolate-zucchini- Add 1/4 cup of shredded zucchini and 2 Tablespoons of cocoa powder
Chocolate chip- add 1/4 cup of EnjoyLife mini chocolate chips
Apple-cinnamon- increase cinnamon, add 1/4 chopped apples.
Subscribe to:
Posts (Atom)